Guides / Cameras and backgrounds
Cameras and backgrounds
Place and shape your cameras, adjust how they look, and blur or replace the background.
Place your cameras
In Studio, drag each camera where you want it in the landscape and vertical previews, drag a corner to resize it, and pick a shape (rectangle, rounded or circle). You can also hide a camera in one format. Every camera is recorded to its own file, so each can sit somewhere different in 16:9 and 9:16, and you can move them again in the editor.
In vertical, the game can sit above your cameras (Split), fill the frame (Crop, with pan and zoom) or show whole over a blurred background (Fit). These are starting points: you can drag and resize the game picture freely.
Adjust how a camera looks
- In Studio: Adjust sets brightness, contrast, saturation and gamma live in OBS. The recording gets it too. Reset takes it off.
- Camera's own settings opens the device's settings (exposure, white balance and so on) in OBS.
- In the editor: select a camera clip and press Look & background… to adjust brightness, contrast, colour and shadows.
Blur, replace or recolour your background
- Select the camera clip in the editorFind Cameras in the properties panel on the right.
- Press Look & background…
- Choose a backgroundAs recorded, Blur, Picture or Colour.
- Wait a moment, onceHighlix finds you in the camera recording, at low priority, and keeps a small mask of it. After that the new background plays in the editor and goes into your exports.
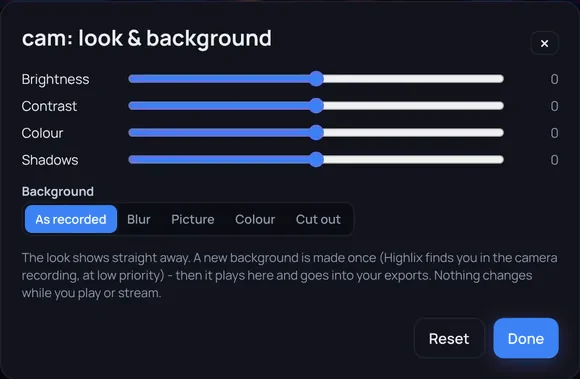
The background is applied in the editor and export only, never live in OBS, so nothing changes while you play or stream. Results vary with your lighting and camera. Even lighting and a background that contrasts with you tend to work best.
Webcam frames
The overlay packs include animated webcam frames (16:9, round, square and tall). A frame sticks to its camera, follows it in both formats and only shows when the camera does. See overlay packs.